Demo System Simulation
In the Demo section, you can configure a complete simulated DEWETRON system, enabling simulation of any DEWETRON device alongside combinable TRION modules. Fig. 17 illustrates the demo screen: ① presents the currently simulated devices with selected modules, while ② lists all objects (devices or modules) that can be added.
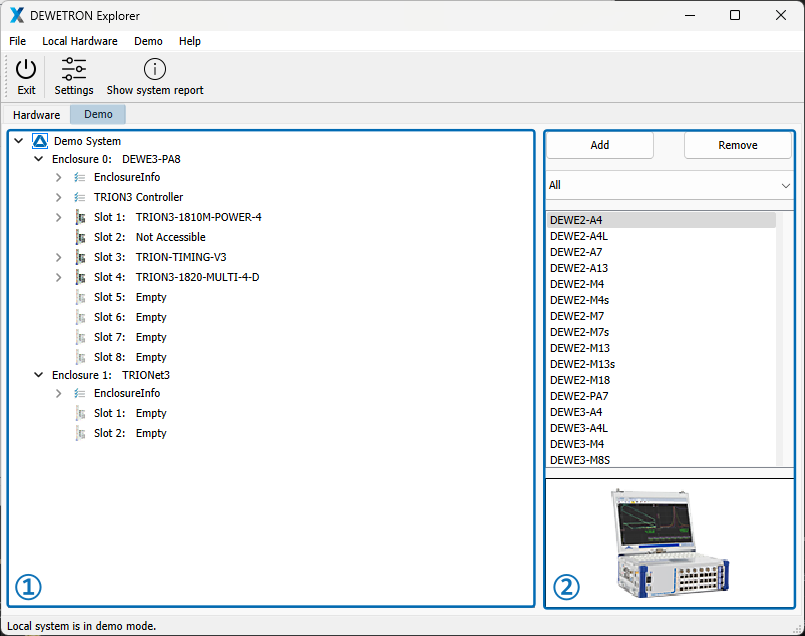
Fig. 17 Demo screen
To add a new device, follow these steps:
Click on “Demo System” in subwindow ① .
Select a device from the object list ② and click “Add”.
Click on an empty module slot. If unavailable, open the drop-down menu.
This action will switch the device list to the module list.
Choose the desired module and click “Add”.
To remove a device or module:
Select the object and click “Remove”. 1. For modules, this action empties the slot. 2. For devices, it removes the device along with all its integrated modules.
To change a device or module:
Remove it and add a new one.
Or, simply click “Replace” to swap it with the currently selected object from the object list.
Additional module specific settings
Power Modules
All TRION(3)-18XX-POWER modules are equipped with a number of exchangeable sub-modules. Therefore, these sub-modules can also be defined in a simulated system.
To do so follow the subsequent steps:
Open the drop-down menu of your power module, and further open the tab “ChannelProperties”. This will list the available channels of your selected power module.
Open the drop-down menu of your desired channel.
Right click on “ChannelModule” and open the module settings.
Select the desired sub-module and click “Apply”.
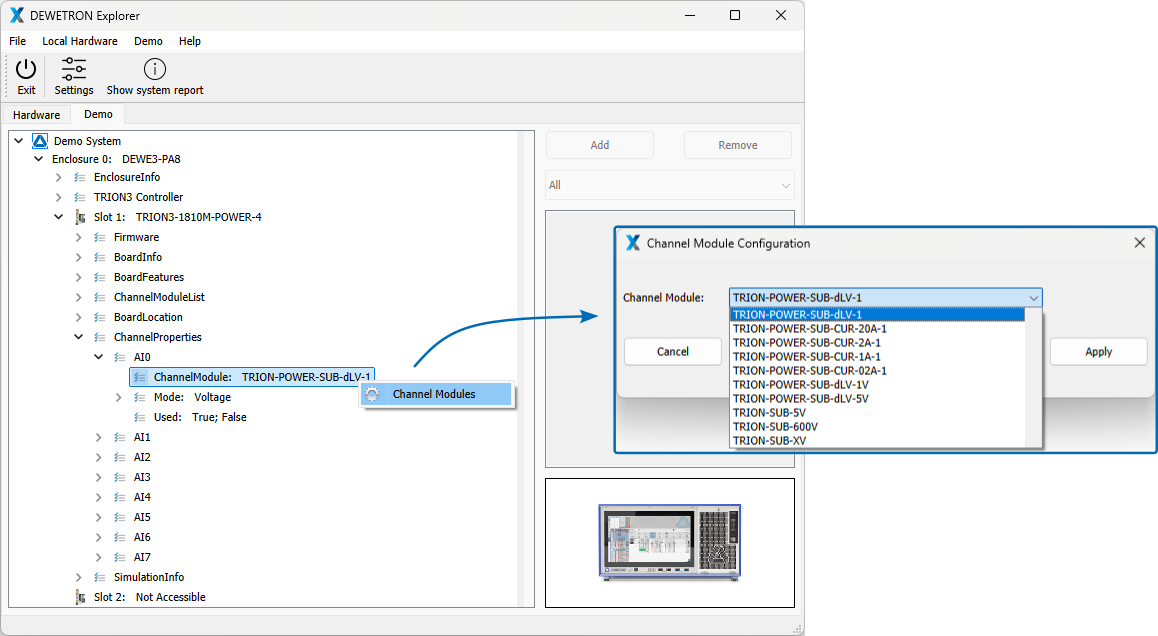
Fig. 18 Sub-module selection for power modules.
Note
For a visual guide on setting up demo systems, check our tutorial video or training presentation.